dsh-text-explain
heartattack2332/dsh-text-explain
Select a passage in a DSH conversation and read a plain-language explanation in a floating panel, which carries the surrounding message as the context. Three explanation depths (plain / general / pro) that re-explain on the spot when switched; optional web search and local file lookup (the model decides by default, and a button can force one lookup that reports only what is new); follow-up questions; and a button that hands the whole exchange to a new session in standby mode - the background is queued without waking the model or spending tokens. Settings live on the host in settings.json, and nothing is written until you press save. The repository also ships an OpenAI-compatible endpoint and a browser extension (source).
インストール
dsh plugin --profile web add github:heartattack2332/dsh-text-explainREADME
dsh-text-explain
简体中文 | English
Made for people who don't speak AI. Select a passage in a DeepSeek Harness conversation — a term, an error message, a wall of jargon — and get it explained in plain words, right where you are reading.
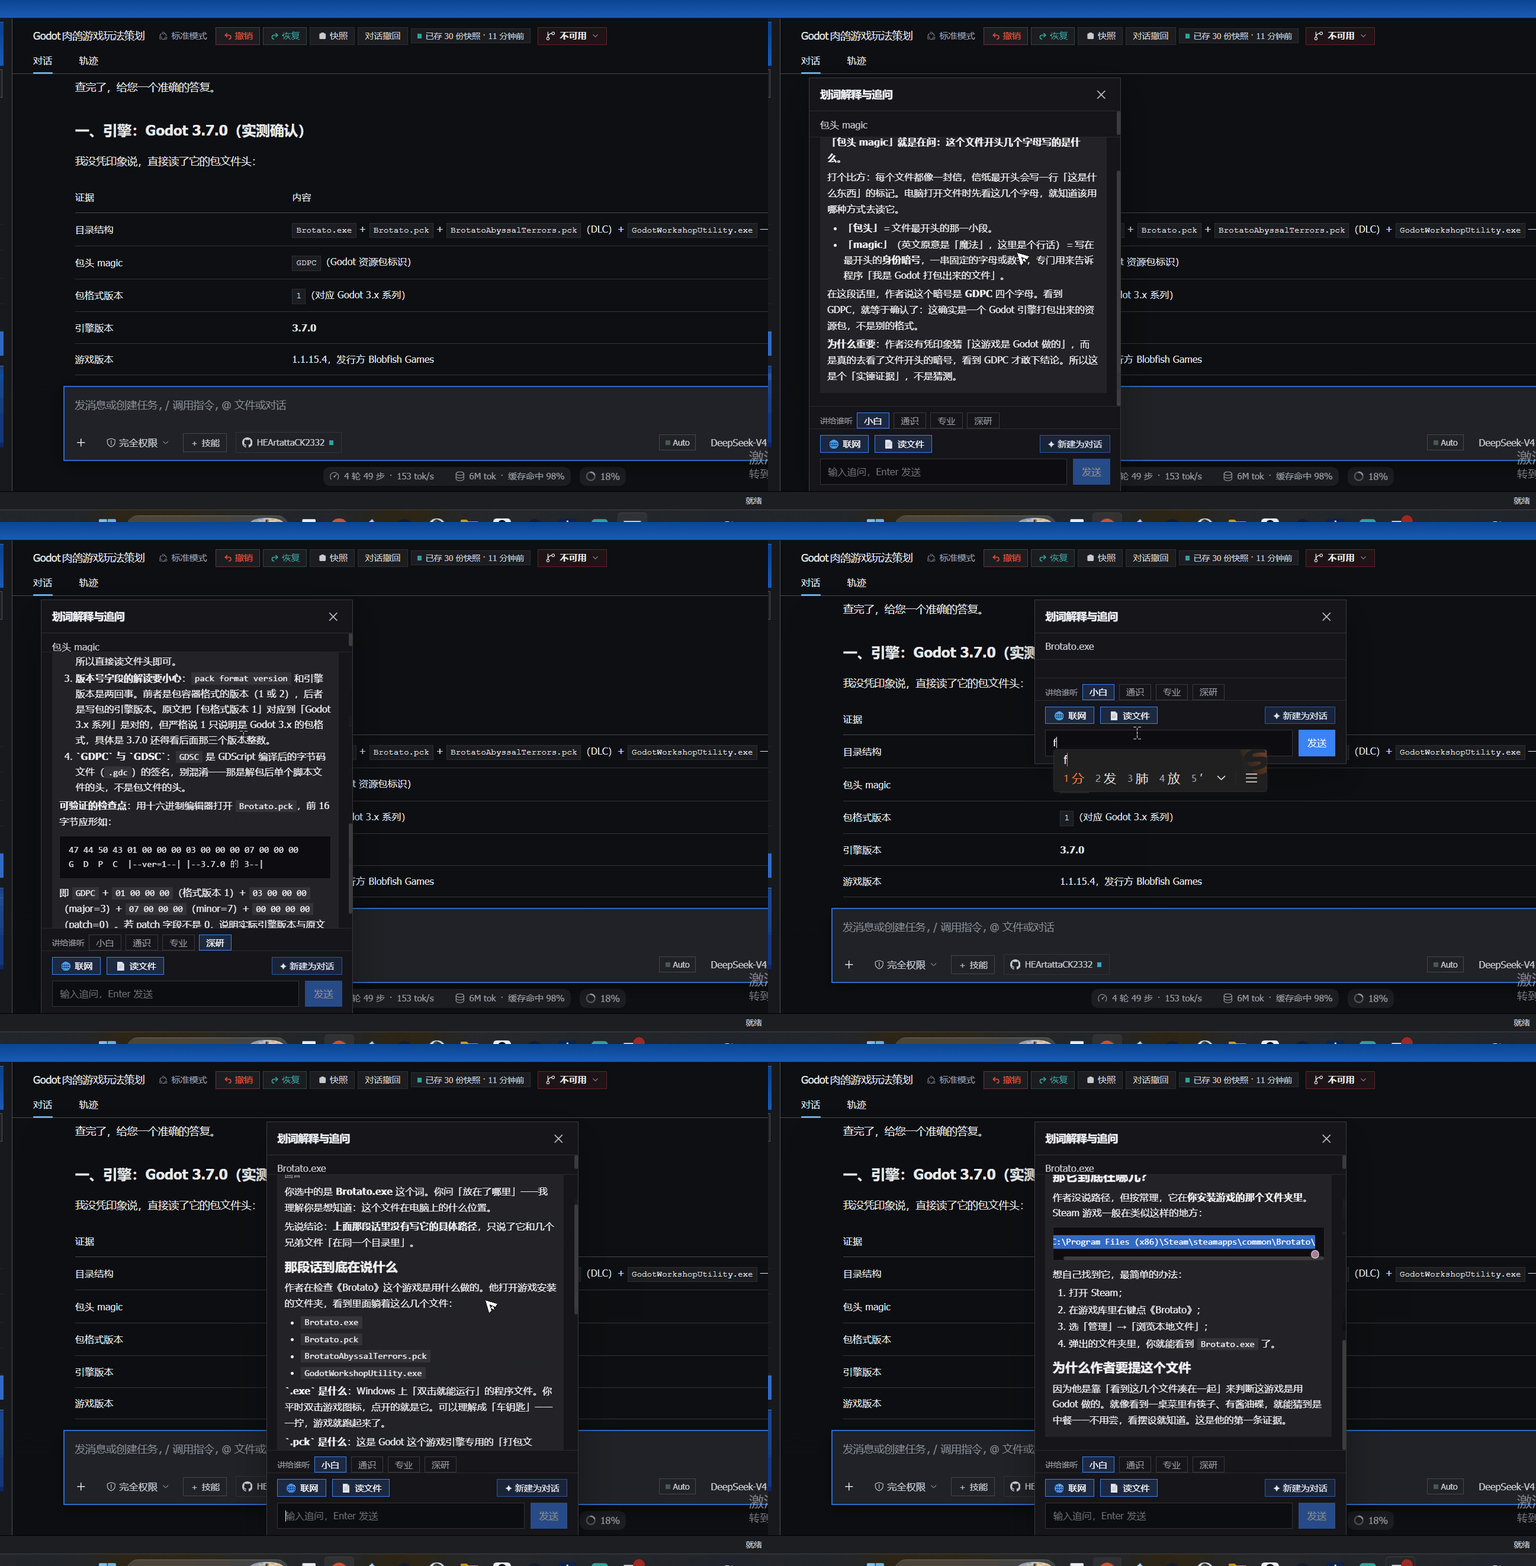
40 seconds, unedited: a Godot build file explained as 「.exe is the cow, .pck is the suitcase — the cow and the suitcase have to travel together」, followed by two follow-up questions.
Why this exists
AI output is full of words you are expected to already know. The usual advice is "just ask the model" — but you have to know what to ask, and the answer often comes back in the same jargon you were stuck on.
This plugin removes that step: select the confusing part, click once, read the plain-words version. No prompt engineering, no second tab, no API key.
Features
- Context-aware. When you select text, it also grabs the whole message the passage came from and hands both to the model. "It will transfer the funds at the end" is ambiguous — until the model can see that "it" means the finance department.
- Depth knob (讲给谁听). Three depths — Plain / General / Pro, defaulting to Plain. Switch one and it re-explains the current question on the spot: the same sentence goes from kitchen-table analogy to engineering vocabulary. A switch in the popup lasts that popup only; set a default in Settings and press Save.
- Standby handoff (✦ New session). The button packs the selection, its source message and everything already asked into a handoff document, drops it into a fresh session and jumps you there. The new session answers with a single line — "背景已了解,等你开口" — and waits: no summary, no questions, no expansion. You already had your explanation; the new session is for what comes next.
- Markdown rendering. Answers render with headings, lists, quotes, code blocks, tables and links — via a hand-written, dependency-free renderer built from React elements (so it is XSS-safe by construction).
- Web search and local files (optional). Two toggles let the model call
web_search/web_fetchfor current information, andsearch_files/read_fileto look things up in your local docs.
Install
dsh plugin --profile web add github:HEArtattaCK2332/dsh-text-explain
Then restart the Web profile so the new bundle layer is loaded.
From a local checkout instead
dsh plugin --profile web add file:<path-to-dsh-text-explain>
Usage
- Select text in any conversation message. The popup automatically carries that message along as context.
- Click AI 解释 to explain it, or 追问 to ask a question about it.
- Read the streamed answer. Type a follow-up and press Enter to keep the same thread; close the window with ✕.
- Switch depth with 讲给谁听 at the bottom of the popup. Changing it re-explains the current question immediately.
- Toggle 🌐 联网 / 📄 读文件 before asking, if you want the model to search the web or read local files.
- Click ✦ 新建为对话 when the thread is worth pursuing: the whole exchange lands in a new session as a handoff, which opens automatically and waits for you to speak.
- Open 设置 → 划词解释 for defaults: which workspace a new session lands in, the default depth, and (under 高级设置) whether the two toggles start on.
Settings
Settings live on the host, in <DSH_HOME>/text-explain/settings.json
(DSH_HOME defaults to ~/.dsh). The settings page keeps a draft: every
click only edits that draft, 保存 writes the whole file, 刷新 throws the
draft away and re-reads what is stored. Nothing you did not save is ever
written to disk — not to the config file, not to browser storage (this plugin
stores nothing in the browser at all).
Browser extension
The same backend also powers a browser extension: select any passage on any web
page and read the explanation in a floating panel (three depths, switchable on
the spot). Source lives in extension/ with its own
README.
You do not need DSH to use it. The extension offers three backends:
- Free models (easiest) — endpoints and model names are pre-filled; all you do is apply for a free key at the provider. Recommended: Zhipu GLM-4.7-Flash, free and reachable from mainland China without a proxy. Also Qwen, Gemini, Groq, OpenRouter, or a local Ollama / LM Studio.
- Local DeepSeek Harness — talks to this plugin, so web search and hand-off-to-a-new-session work as well.
- Your own API — any OpenAI-compatible endpoint.
The three depth levels work identically in all three.
Load it unpacked: open chrome://extensions/, turn on Developer mode, click
Load unpacked, and pick the extension/ folder.
Use it from other apps
The host half also speaks the OpenAI chat-completions protocol, so any client that accepts a custom API base URL can use this plugin as its backend — Obsidian plugins, browser extensions, your own scripts.
Base URL : http://127.0.0.1:3080/api/text-explain/v1
API key  : anything (or leave it empty)
Model    : text-explain-plain | text-explain-general | text-explain-pro
GET /modelslists the three depths.POST /chat/completionstakes the standard shape and supportsstream: true(SSE).- The model name picks the depth:
text-explain-plainis the default voice (for people who don't speak AI),text-explain-prothe most technical. - A
systemmessage from the caller is ignored on purpose — the whole point of this plugin is that the explanation style is not up to the caller. - Callers without an
Originheader (curl, local scripts) work out of the box. Callers with one must be listed inallowedOrigins(see Design notes) — desktop apps included: Obsidian sendsOrigin: app://obsidian.md, so that exact line belongs in the allowlist.
Tests
Three stub-based self-check suites ship in the box. They need nothing but Node's
built-in modules — no test framework, no npm install:
node test/run-all.mjs # all three; or run any single file
test/host.test.mjs— drives the real HTTP endpoints against a fakellm/webServer: the three depths must produce three different system prompts; an unknownlevelmust fall back toplain(never an error); context must still be injected; an empty selection must be rejected. It also checks the settings endpoint creates no file until you save, sanitizes dirty input, and leaves stored settings untouched on a bad payload. Everything is written to a tempDSH_HOME, never your real one.test/settings.test.mjs— loadslib/client.jsagainst React / fetch stubs: module shape, slot registration, settings normalization, cache behaviour, failure fallbacks, and the rule that matters — only Save issues a POST. Thewindowstub deliberately has nolocalStorage, proving browser storage is really gone.test/render.test.mjs— renders both components on a React stub: the settings page (loading / ready / error, collapsed and expanded) and the popup with a full Markdown answer, exercising the hand-written renderer.
Design notes
- The selected text goes to
deepseek-official/deepseek-v4-flashby default; no separate API key is stored by this plugin. - Intentionally dependency-free and hand-written: no build step.
- Host half (
lib/index.js) registersPOST /api/text-explainandGET/POST /api/text-explain/settingsas exact routes. The four depth prompts share one skeleton (「语境」/「格式」are common; only 「读者 + 怎么讲」 differ), so a single code path serves all four. - Context comes from the DOM: the client walks up from the selection anchor to the outermost ancestor that still fits the same message (capped at 4000 characters). If that walk fails, the explanation still works — just without context.
- Web search uses Bing's RSS endpoint (
format=rss) — no API key, and reachable on networks where DuckDuckGo is not.web_fetchstrips HTML to plain text; it works for static pages, not JavaScript-rendered ones. search_filesreturns only document files (README / SKILL.md / package.json / …) and skips runtime directories such asundo,snapshotsandlogs.read_filerefuses files over 512 KB, truncates long text, and never writes.- Cross-origin calls (the door for a future browser extension): the endpoint
inspects
Originfirst. No origin, or same-origin as the host, behaves exactly as before; only origins listed in theallowedOriginsallowlist get CORS headers, everything else gets a flat 403 — so a random web page cannot burn your quota. The allowlist defaults to an empty array, so the default behaviour is unchanged.
License
MIT — see LICENSE.